
Painting Realistic Skin Tones on Resin Miniatures
Share
By: Pose & Plinth
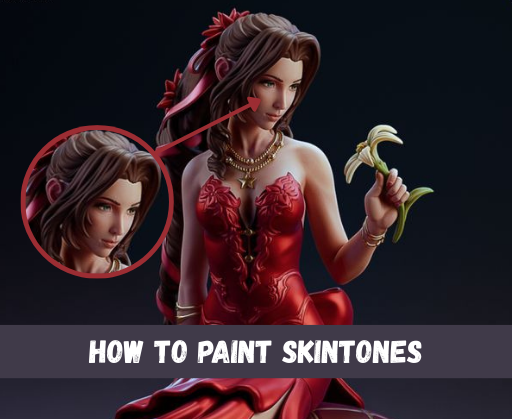
When it comes to bringing resin‑printed human characters to life, nothing makes a bigger difference than the skin. Get it right, and your figure feels warm, believable, and full of personality. Get it wrong, and even the most detailed sculpt can look flat or lifeless. Inspired by the techniques demonstrated by Groundeffected on YouTube, this guide walks through a simple, repeatable process for painting skin tones that look natural on scaled figures.
Preparing the Model
It all starts before you even open a paint pot. Preparation is key: remove any mold lines or seams with a sharp hobby knife or fine file, then give the model a gentle wash in warm, soapy water to strip away any lingering release agents from the printing process. Once dry, apply a light coat of primer—white or light grey works best here—so your skin tones will stay bright and vibrant.
Building the Base Layer
The base layer sets the stage for everything that follows. Thin your chosen flesh tone—Vallejo Flat Flesh is a reliable option—with a little water or flow improver until it’s the consistency of skim milk. Apply two thin coats rather than one heavy one, letting each layer dry completely. This ensures a smooth, even surface without obscuring fine sculpted details.
Adding Depth with Shadows
Shading is where the figure starts to gain depth. A warm wash, such as Citadel’s Reikland Fleshshade, settles beautifully into recesses like eye sockets, under the nose, and around the mouth. Work quickly and wick away any excess to avoid tide marks. For deeper contrast, mix a touch of warm brown into your base tone and carefully reinforce the deepest shadows.
Highlighting for Realism
Highlights bring the skin to life. Start by mixing your base tone with a lighter flesh colour—Pale Flesh works well—and apply it to raised areas like cheekbones, the bridge of the nose, and the forehead. For the brightest points, such as the tip of the nose or the chin, add a little more of your lightest tone, like Kislev Flesh, to really make them pop. Keep your layers thin and your transitions soft; harsh edges can make the skin look chalky.
Adding Warmth with Glazes
To add warmth and realism, introduce subtle glazes. A heavily thinned rosy red, such as Reaper’s Sanguine Red, brushed lightly over the cheeks, ears, and fingertips, mimics the natural flush of blood beneath the skin. This small touch can make a surprising difference in how “alive” the miniature feels.
Detailing the Face
Facial details deserve special attention. Lips can be painted with a mix of your base flesh tone and a hint of red, with a lighter highlight along the upper edge. For eyes, start with an off‑white sclera, add a carefully placed iris, and finish with a tiny wash around the lids to define the socket. Eyebrows and stubble can be dry‑brushed in with a darker hair colour, then glazed to blend them into the skin.
Sealing and Finishing Touches
Once you’re happy with the result, protect your work. A matte or satin varnish will keep the skin looking natural, while a touch of gloss on the eyes and lips adds a realistic sheen. Always check your miniature under different lighting to make sure your blends look smooth and your tones are balanced.
Final Thoughts
Painting skin is a skill that improves with practice, but by following these steps—and studying painters like Groundeffected—you can achieve results that make your resin figures stand out. Thin layers, patient blending, and a few well‑placed glazes are all it takes to turn a static sculpt into a character that feels truly alive.
Check him out if you haven't already!